
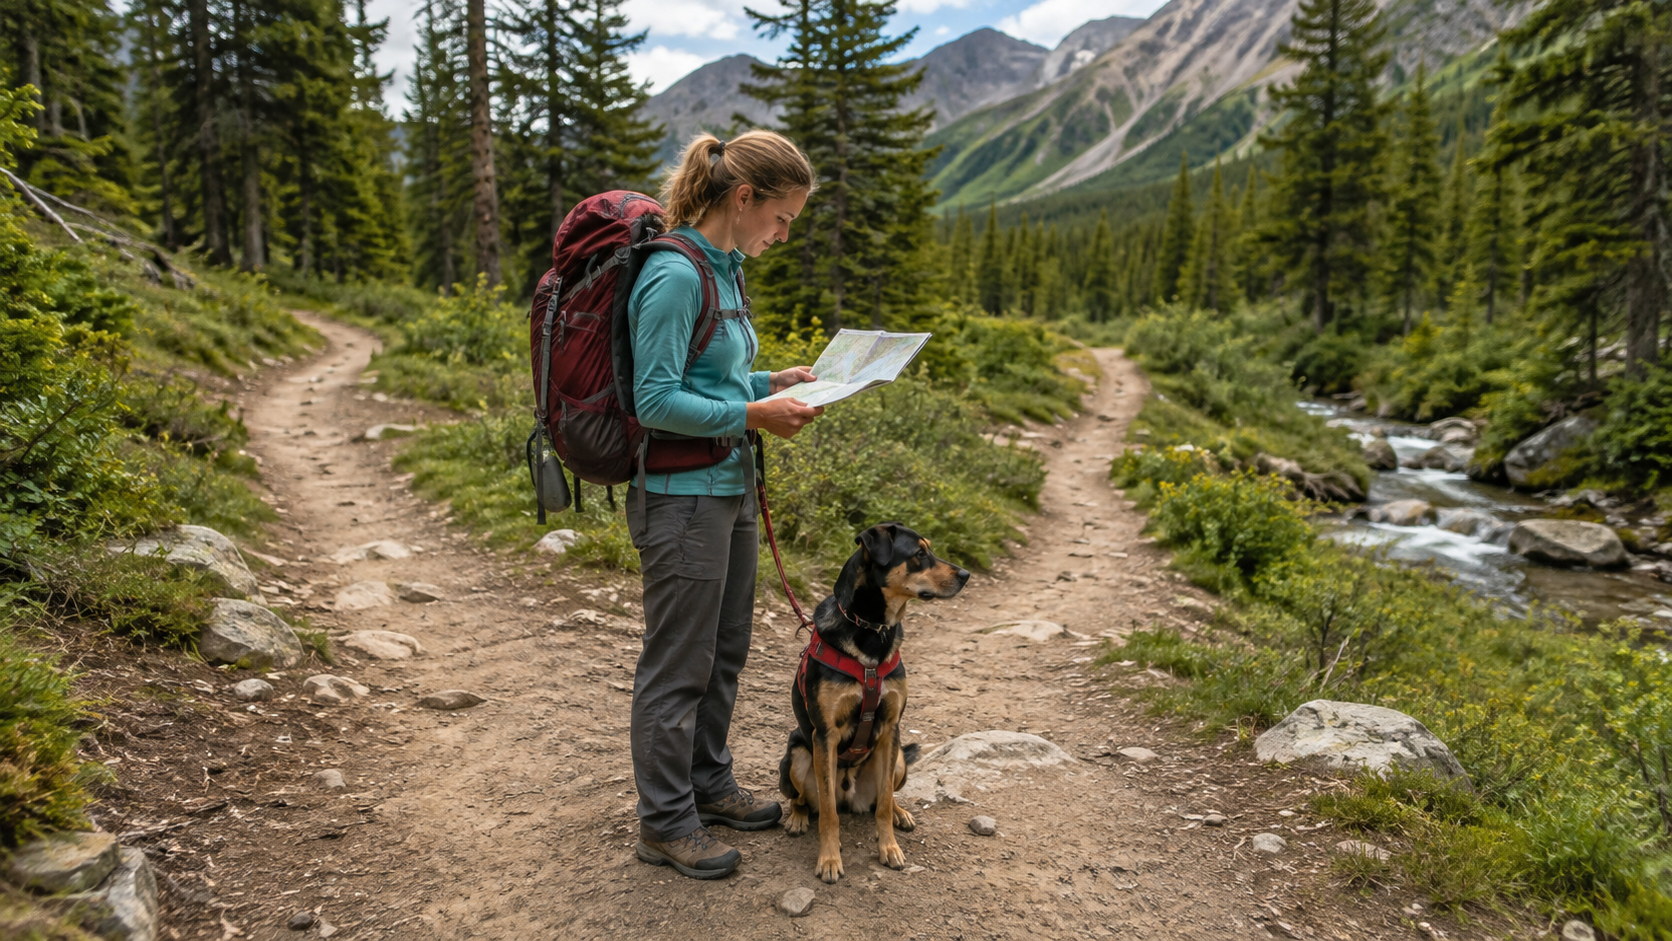
Finding a trail that allows dogs is only the beginning of choosing a good backpacking route.
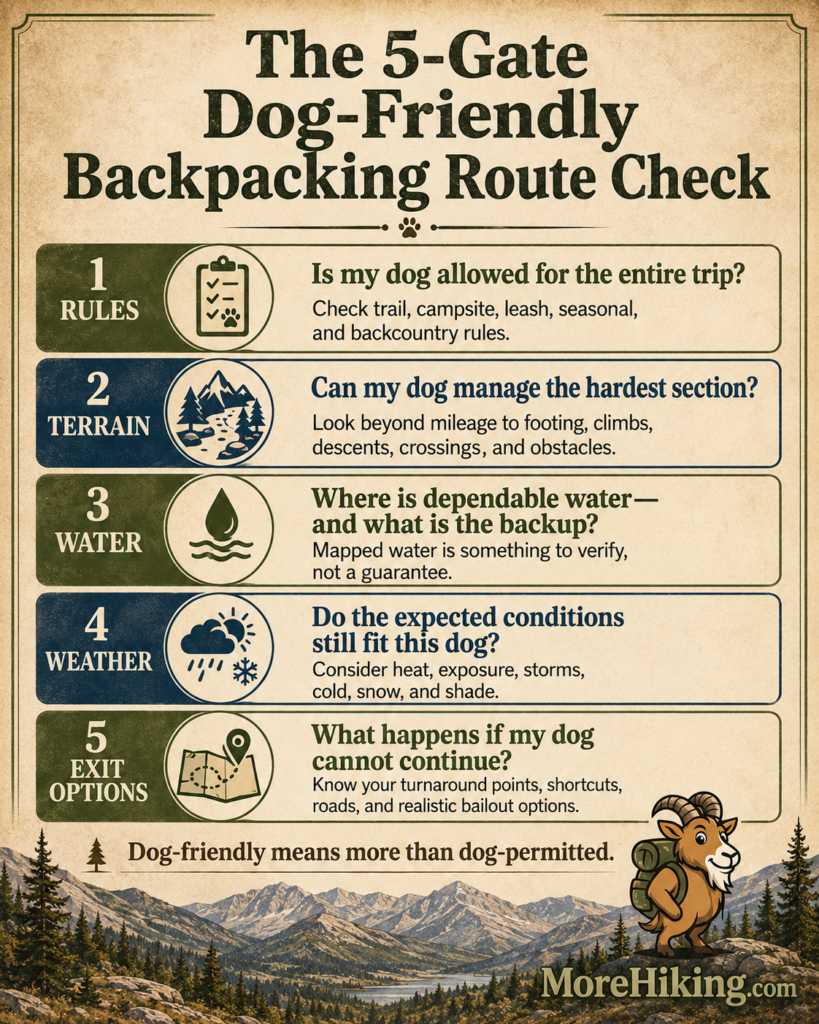
A genuinely dog-friendly backpacking route needs to pass five tests: your dog must be allowed there, the terrain must be appropriate, the water plan must work, the expected weather must be manageable, and you need a realistic way to leave early if something goes wrong.
That last point matters more than many hikers realize. A route is not suitable simply because your dog can walk into it. You also need to know what happens if your dog becomes tired, develops a sore paw, cannot safely cross an obstacle, or suddenly cannot continue.
Before committing to a route, run it through these five gates.
| Route Check | Main Question | Warning Sign |
|---|---|---|
| Rules | Is my dog actually permitted everywhere we plan to go? | Trail, campsite, wilderness, or seasonal restrictions are unclear. |
| Terrain | Can my dog comfortably manage the hardest section? | Technical obstacles, rough footing, difficult crossings, or terrain beyond proven ability. |
| Water | Do we have dependable water and a backup if it is unavailable? | Long dry stretches or unconfirmed seasonal sources. |
| Weather | Do the expected conditions still make this route fair for my dog? | Heat, storms, exposed terrain, snow, or other conditions the dog is not prepared for. |
| Exit Options | Can we shorten or leave the trip if my dog cannot continue? | A remote route with no practical bailout or realistic evacuation plan. |
A route does not need to be effortless. It does need to make sense for the dog, the hiker, and the conditions you reasonably expect to encounter.
If you are still building the complete trip, MoreHiking’s dog-backpacking planning system explains how route choice connects with conditioning, gear, food, water, camp routine, first aid, and recovery.
Gate 1: Confirm That Dogs Are Actually Allowed
Never use “dog-friendly” in a trail description as your final authority.
Check the official website for the park, forest, wilderness area, or other land manager responsible for the route. Confirm the rules for the specific trail and backcountry area, not simply the campground or park entrance.
The National Park Service advises visitors to check individual park information because pet rules can differ from one park to another. Some parks severely restrict dogs on hiking trails, while others provide considerably more access.
Look for more than a simple yes or no. Check:
- whether dogs are allowed on the complete route;
- whether dogs are allowed at the planned campsite;
- leash requirements;
- seasonal restrictions;
- wilderness or protected-area restrictions;
- permit conditions that affect dogs;
- and any current trail closures that alter your planned route.
A route fails this gate if your dog cannot legally complete the entire itinerary.
It is much better to discover that at home than several miles into a trip.
Gate 2: Judge the Hardest Terrain, Not Just the Mileage
A trail profile showing eight miles does not tell you enough.
Two eight-mile routes can ask very different things from a dog. One may follow shaded forest tread with moderate grades. Another may include loose rock, steep descents, exposed ledges, difficult stream crossings, narrow footing, or obstacles that require climbing or scrambling.
The better question is:
What is the hardest part of this route, and have I seen my dog comfortably handle something similar?
Look closely at elevation profiles, trail descriptions, maps, recent condition reports, photographs, and information from the land manager.
Pay particular attention to the following.
Surface
Long stretches of abrasive rock, loose scree, sharp stone, snow, mud, or hot exposed surfaces can change the difficulty of a route considerably.
Dogs can suffer paw injuries on rough trail surfaces. The route-selection lesson is simple: if the surface is likely to exceed what your dog’s paws have demonstrated they can tolerate, choose another route or build more experience first.
Detailed paw injuries and treatment belong in MoreHiking’s canine first-aid guide rather than here.
Steep and Technical Sections
A dog may be perfectly capable of climbing a steep trail yet struggle coming down it. Scrambles, ladders, large boulder steps, narrow ledges, cables, or other technical features require even more caution.
Do not assume that an obstacle will somehow work itself out once you reach it.
If your plan depends on lifting, lowering, or physically assisting your dog through a major obstacle, decide whether that is genuinely realistic before the trip.
Water Crossings
A stream can be both a water source and a terrain obstacle.
Check whether significant crossings exist and whether current conditions are likely to change their difficulty. A route that is comfortable during low water may become a very different trip after heavy rain or seasonal runoff.
Distance and Elevation
Mileage still matters, but interpret it through what you already know about your dog.
A conditioned dog with experience on hills and rough surfaces gives you useful evidence. A dog whose longest recent outing was a flat neighborhood walk does not.
Detailed conditioning belongs in how to prepare your dog for a multi-day hike safely. For route selection, use the dog’s demonstrated ability rather than what you hope the dog will be able to do.
Gate 3: Build the Route Around Dependable Water
Water availability can determine whether an otherwise attractive dog-backpacking route is practical.
Start by marking the likely water sources along the route. Then challenge each one.
Is it perennial or seasonal? Is there recent information suggesting it is flowing? Is it reasonably accessible? What happens if it is dry when you arrive? How far is the next option?
A blue line on a map should be treated as something to investigate, not a promise that usable water will be waiting for you.
Your plan should identify:
Primary source → backup source → amount you must carry if both assumptions fail.
This article should not recalculate your dog’s daily hydration needs. That work belongs in how much food and water your dog needs for backpacking.
Water quality matters too. Natural-looking water is not automatically appropriate for a dog.
One particular concern is a harmful algal bloom. The Environmental Protection Agency advises keeping dogs from drinking or swimming in water showing suspicious foam, scum, mats, unusual coloration, or other signs of a possible bloom.
For route planning, that creates a simple rule:
A water source you cannot safely use is not part of your water plan.
If losing one questionable or seasonal source would leave you unable to carry enough water to the next dependable option, reconsider the route.
Gate 4: Evaluate the Weather Against the Route
Do not ask only, “What will the weather be?”
Ask:
What does this weather do to this particular route for this particular dog?
The same temperature can have very different consequences on a shaded forest trail and a long exposed climb. Rain may be manageable on easy ground but make steep rock, mud, stream crossings, or cold overnight conditions more serious.
Heat deserves particular attention.
Cornell University’s veterinary guidance identifies strenuous exercise in hot or humid weather as an important heatstroke risk and recommends adjusting activity to cooler conditions and providing access to shade and water.
That means route planning should consider:
- how much of the route is exposed to direct sun;
- where shade is available;
- when the major climbs occur;
- whether water access becomes harder during hot conditions;
- and whether the planned mileage gives you room to slow down.
Thunderstorms change the calculation as well.
The National Weather Service emphasizes that there is no safe place outdoors during a thunderstorm and recommends reaching a substantial building or hard-topped vehicle when thunder threatens. On a remote backpacking route, those safe locations may be impossible to reach once you are committed.
That makes forecast timing, exposed terrain, turnaround points, and route choice important before you leave.
Check the forecast for the actual hiking area rather than relying only on conditions in the nearest town. Recheck close to departure because the route you selected several days earlier may no longer be the route you should hike.
Good route planning allows the weather forecast to change the plan.
Gate 5: Know How You Will Get Out
This is the gate that turns ordinary trip planning into contingency planning.
Before leaving, look at the entire route and ask:
If my dog could not continue from here, what would I do?
An exit option or bailout route is a practical way to shorten the trip or reach a trailhead, road, staffed area, alternate campsite, or other location from which you can safely end the trip.
A line on the map is not automatically a useful bailout. You need to know where it leads and whether you could realistically use it with a tired or injured dog.
Look for:
- side trails leading to accessible trailheads;
- road crossings;
- shorter loop options;
- turnaround points;
- alternate campsites;
- junctions that allow you to shorten the following day;
- and sections where turning back becomes more difficult than continuing.
An out-and-back route can sometimes make early turnaround decisions simpler because you return over familiar terrain. That does not automatically make it safer; difficult terrain, weather, water, and remoteness still matter.
Loops require different thinking. Once you have passed certain junctions, continuing may become easier than retreating. Know those decision points before the hike.
Most importantly, think about your dog’s size.
MoreHiking’s first-aid guidance already asks hikers to consider whether they could physically move their dog if the dog could no longer walk. That question should influence route choice before an emergency ever happens.
For detailed emergency response, see canine trail and emergency first aid.
A remote route with few exits may be reasonable for one trail team and inappropriate for another.
Use Green, Yellow, and Red Flags Instead of a Perfect Score
You do not need complicated mathematics to compare two routes. Instead, classify each important factor as green, yellow, or red.
A green flag means the route factor fits your dog and your plan well. A yellow flag means there is a concern, but you have a realistic way to manage it. A red flag means the problem cannot reasonably be solved for this trip.
Yellow does not automatically mean you should cancel, but it should have a clear answer before you leave.
Most importantly, do not let several green flags convince you to overlook one serious red flag. If a critical part of the route does not work for your dog, choose another route.
You do not need a complicated scoring system to compare routes. A simple Green / Yellow / Red check can help you decide what to do next.
Green — Good fit
Legal access is confirmed, the terrain fits your dog, water is dependable, weather looks manageable, and you have realistic exit options.
Yellow — Needs a plan
A concern exists, but you have a clear response. For example, a water source may be seasonal, a rough section may require extra caution, or warmer conditions may mean you need to adjust the day.
Red — Choose another route
The problem cannot reasonably be managed. Examples include a route where dogs are not allowed, an obstacle your dog cannot safely handle, inadequate water, unsafe weather, or no realistic exit plan.
Bottom line: Do not average a red flag away.
A Simple Route Comparison
Imagine you are deciding between two hypothetical overnight trips.
Route A is a scenic 12-mile loop. Dogs are permitted, but most of the route is exposed. The only mapped stream is seasonal, the second half includes several miles of rocky terrain, and after the halfway point there is no practical shortcut back to the trailhead.
Route B is an 8-mile out-and-back through mostly shaded terrain. Dogs are permitted, dependable water can be confirmed near camp, the footing resembles trails your dog has already handled, and you can turn around at several points without creating a complicated exit.
Route A may look more exciting.
Route B may be the better dog-backpacking route.
That is the point of the five-gate system. You are not trying to identify the most impressive trail that permits dogs. You are choosing the route that gives your trail team the best chance of completing the trip comfortably while keeping reasonable alternatives available.
Match the Route to the Whole Trail Team
Route choice is connected to the rest of your backpacking system.
If your dog will wear a pack, the terrain and weather influence whether that remains sensible. MoreHiking’s dog backpacking gear system covers pack fitting, load balance, trail equipment, and what the dog should carry.
If water availability means you must carry considerably more water, that may change the human pack weight or daily mileage.
If your dog struggled to recover after a similar route, those recovery observations should inform the next trip rather than being forgotten as soon as the dog feels better.
These systems influence route choice, but they do not change the basic decision:
Does this route fit this dog under these expected conditions?
The Final Dog-Friendly Route Check
Before you commit to the trip, you should be able to answer these five questions without guessing:
- Rules: Is my dog legally permitted for the entire itinerary?
- Terrain: Can my dog reasonably handle the hardest expected section?
- Water: Where are our dependable sources, and what is the backup?
- Weather: Do the expected conditions still make this a fair route?
- Exit options: What will I do if my dog cannot continue?
If one answer is weak, solve it before departure.
If it cannot be solved, pick another route.
The goal of dog backpacking is not to prove how difficult a trail your dog can endure. It is to choose a trip that you and your dog are prepared to manage together.
A trail that you confidently reject can be just as good a planning decision as the trail you ultimately hike.
Frequently Asked Questions
Does “dogs allowed” mean a backpacking trail is dog-friendly?
No. Permission only answers the legal-access question. A suitable route also needs terrain, water, weather, distance, campsites, and exit options that make sense for your particular dog.
Is an out-and-back route better than a loop when backpacking with a dog?
Not automatically, but an out-and-back can make early turnaround decisions simpler because you normally return over familiar terrain. Evaluate the actual terrain, water, weather, remoteness, and evacuation difficulty rather than choosing by route shape alone.
How can I tell whether a mapped water source will actually be available?
Use the map as a starting point, then look for current information from the land manager and other reliable recent condition sources. Identify a backup source and determine what you will carry if the expected source is unavailable.
What is a bailout route in backpacking?
A bailout route is a practical way to shorten or end your trip before completing the original itinerary. It might lead to another trailhead, road, alternate campsite, or shorter route. It only counts as a useful bailout if you could realistically use it under the circumstances that might force you to leave.
When should I reject a route even though dogs are permitted?
Reject it when an important problem cannot reasonably be managed—for example, terrain your dog cannot safely negotiate, inadequate water, unsuitable expected weather, or remoteness that leaves you without a realistic plan if your dog cannot continue.
Leave a Reply