
Why your “waterproof” groundsheet footprint leaks when you kneel and the $30 hack to fix it.
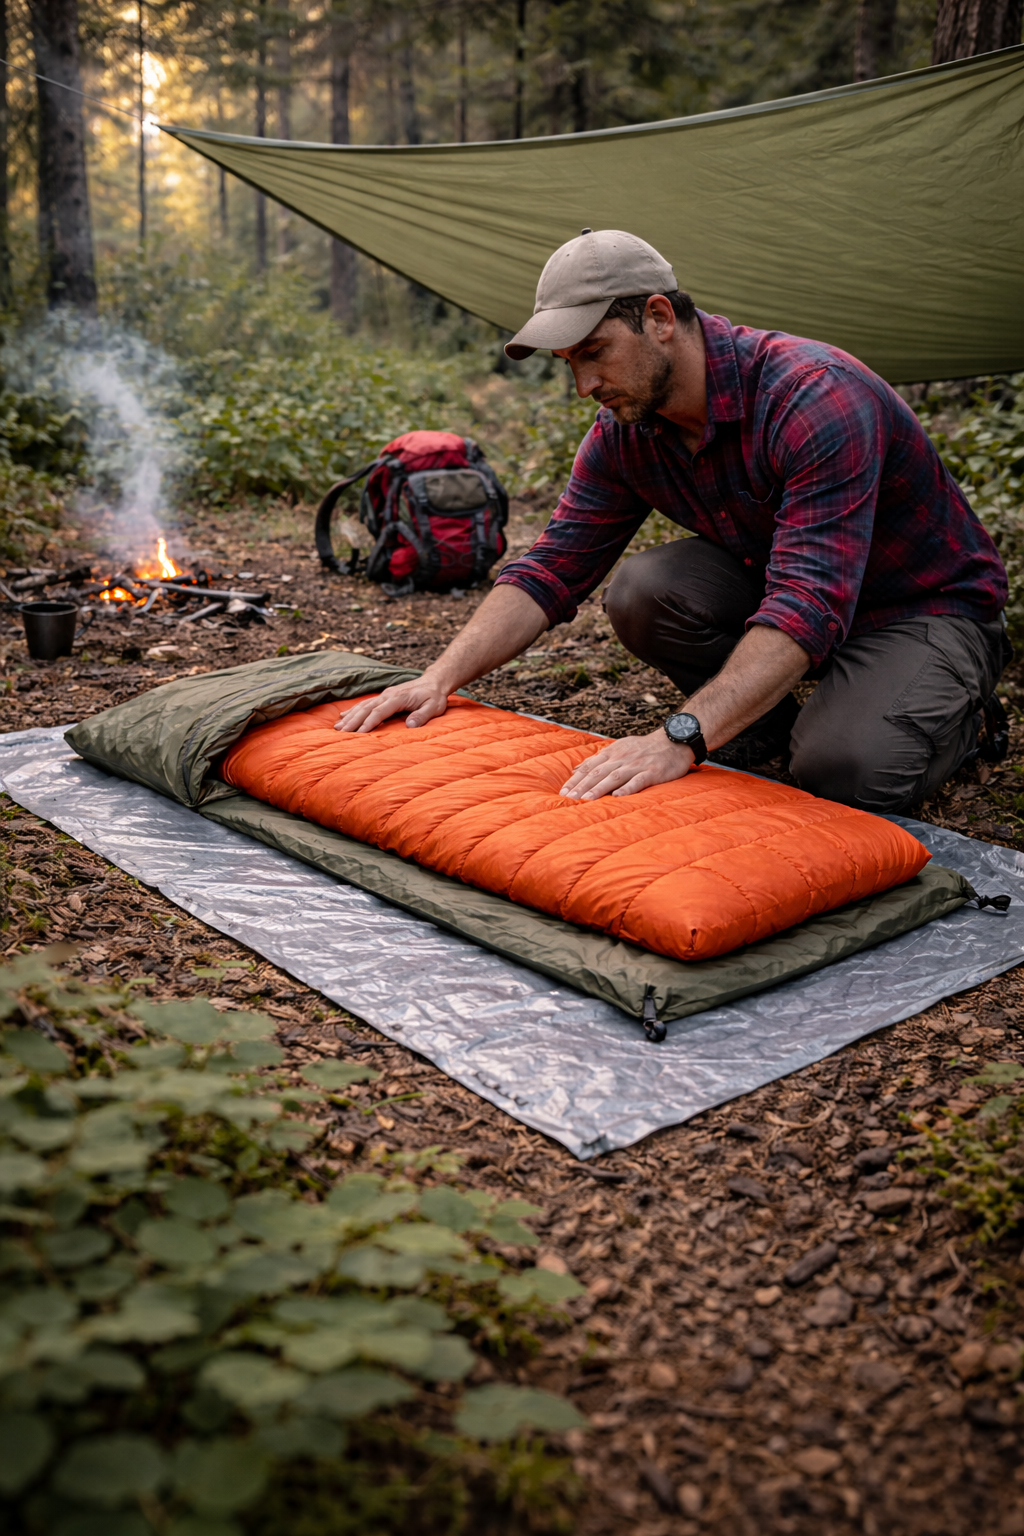
Imagine this: You’re deep in the Washington woods. You’ve finally hit that “Sub-10” goal we talk about in our [Minimalist Gear Guide]—your pack weighs less than 10 pounds! You feel fast and light. You set up your tarp, crawl into your sleeping bag, and close your eyes.
Then, you feel it. A cold, wet spot on your back.
By morning, your expensive down quilt is soaked. You didn’t even get rained on—the moisture came from the ground. How did this happen? More importantly, how do you stop it without adding five pounds of heavy gear back into your pack?
Please enjoy our minimalist groundsheet blog below, some links on this page are affiliate links. If you buy through these links, we may earn a commission at no extra cost to you. This helps support our site and allows us to continue producing helpful hiking content.
The Physics of the “Kneel Test”
Why do ultralight footprints fail when the clouds open up? The answer lies in Hydrostatic Head (HH) ratings, but with a twist that gear manufacturers rarely mention: Point Loading. This is the point that the product will allow moisture to pass through.
Manufacturers often boast about a 1,200mm or 2,000mm. That sounds impressive until a 180-pound hiker kneels on their groundsheet while on a mossy bog. When you kneel on a thin sheet of plastic, all your body weight is pressing down on one tiny spot. This pressure is so strong it actually pushes water through the tiny holes in the fabric’s weave. This is called “wicking.” Once that water touches your sleeping bag, it’s game over for your warmth.
To stay dry, you need a barrier that doesn’t have a weave at all.
Material Science: Choosing Your 2-Ounce Foundation
When you’re counting every gram to hit that sub-10-pound base weight, you can’t afford a heavy PVC tarp. You need materials that offer maximum protection for minimum mass.
| Material | Weight (Solo) | Durability | Best For |
|---|---|---|---|
| Polycryo (Duck Brand Window Kits) | 1.5 – 2 oz | Low | True Ultralight / Clean Trails |
| Tyvek (Soft) | 3.5 – 5 oz | High | Rocky Terrain / Longevity |
| 20D Silnylon | 4 oz | Medium | General Minimalist Use |
| DCF (Dyneema) | 1 – 2 oz | High | Those with no budget limit |
Polycryo: The Invisible Powerhouse (The “Ghost” Sheet)
Often sold as window insulation kits, Polycryo (polyolefin) is the secret weapon of the ultralight community. It is essentially a high-strength, non-porous film. Because it has no weave, it has a theoretically infinite hydrostatic head, meaning it has no way for moisture to pass through. It’s so clear you can barely see it, so you can kneel on it in a puddle, and because it’s a solid film (not a fabric), water cannot be forced through it. At MoreHiking we thought this was our first pick because of the weight and it is the most economical solution with the best water proof properties.
- Weight: ~1.6 oz for a solo setup.
- The Downside: It’s slippery and can be a nightmare to manage in a high-alpine wind.
Check Current Price and Availability at Amazon.
Tyvek 1443R: The Professional’s Choice (The Tough Guy)
You’ve seen it wrapped around houses during construction, but Tyvek is a minimalist staple for a reason. Specifically, the “Soft Structure” 1443R variety is breathable but highly water-resistant and almost impossible to rip. We also liked the durability and multiple use value for this product over the Polycryo sheets despite it being more expensive initially.
- Pro Tip: New Tyvek is crinkly and loud enough to wake the dead. Throw your groundsheet in a washing machine (no soap) with a couple of tennis balls. It comes out feeling like soft cloth but retains its puncture resistance.
Check Current Price and Availability at Amazon.
20D Silnylon and DCF (Dyneema)
Silnylon is durable but prone to “mist-through” under high pressure. Dyneema Composite Fabric (DCF) is the “luxe” option—incredibly light and waterproof—but it will hurt your wallet as much as it helps your pack weight.
Check Current Price and Availability at Amazon.
Or
The $30 DIY Hack
You don’t need to spend $50+ on a fancy brand-name footprint. Here’s how to make your own using a window kit:
- Measure Twice: Lay your pad on the film. Cut the film so it’s about 3-5 inches wider than your pad on all sides, depending on your tarp size.
- Round the Corners: Use sharp scissors to make the corners round. Sharp, 90-degree corners are where tears usually start.
- Don’t Fold It: Just stuff it into an outside pocket on your pack. This helps any leftover dampness dry out while you hike.
Engineering the “No-Splash” Zone
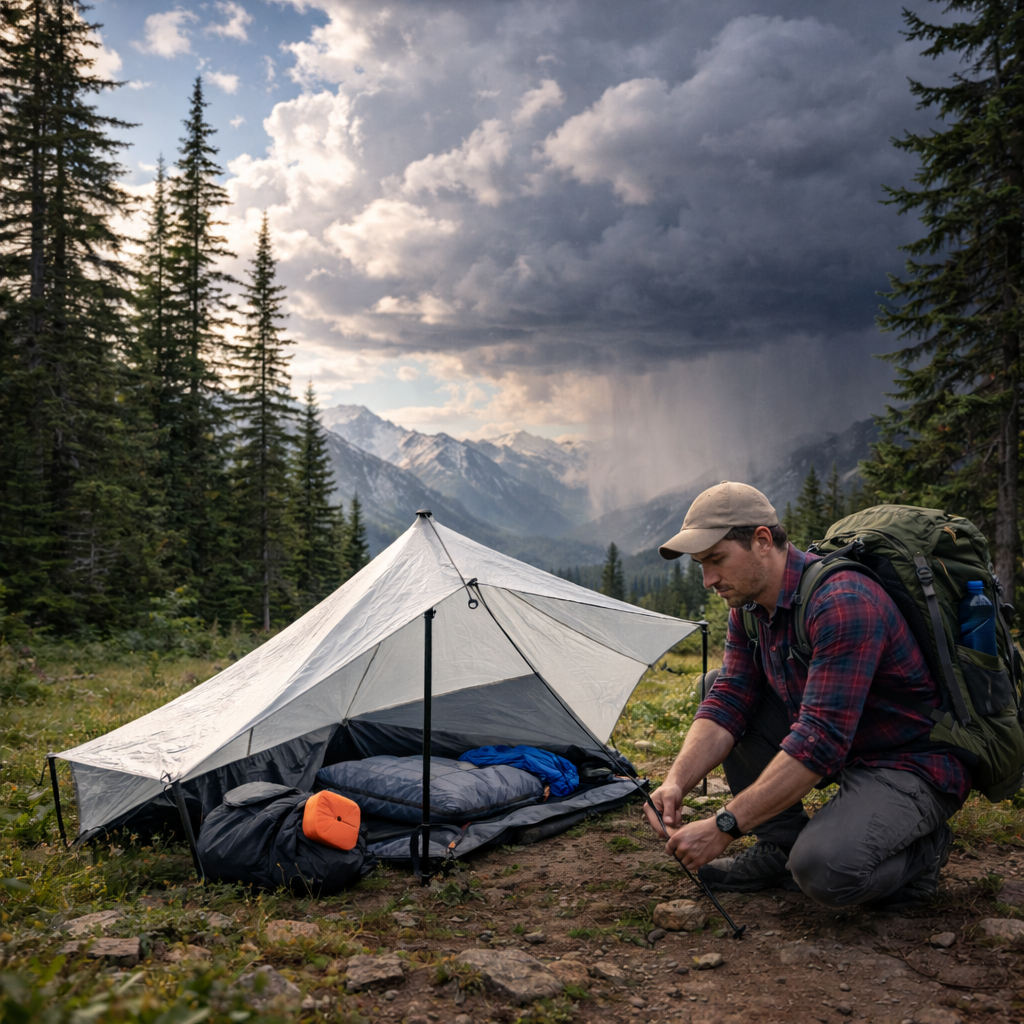
A groundsheet isn’t just a floor; it’s a component of your [Minimalist Shelter System]. In a floorless setup, you face Splash-back—rain hitting the ground and bouncing mist onto your gear.
- Site Selection: Avoid “scoured” dirt where water pools. Aim for pine-needle duff or rocky outcrops that allow drainage.
- The Overlap: Your groundsheet should never extend beyond the “drip line” of your tarp. If it does, it acts as a funnel, bringing rain directly into your sleep system.
- Vapor Management: By using a non-porous sheet, you stop the earth’s natural evaporation from rising into your quilt, a critical step we cover in our guide to [Preventing Condensation].
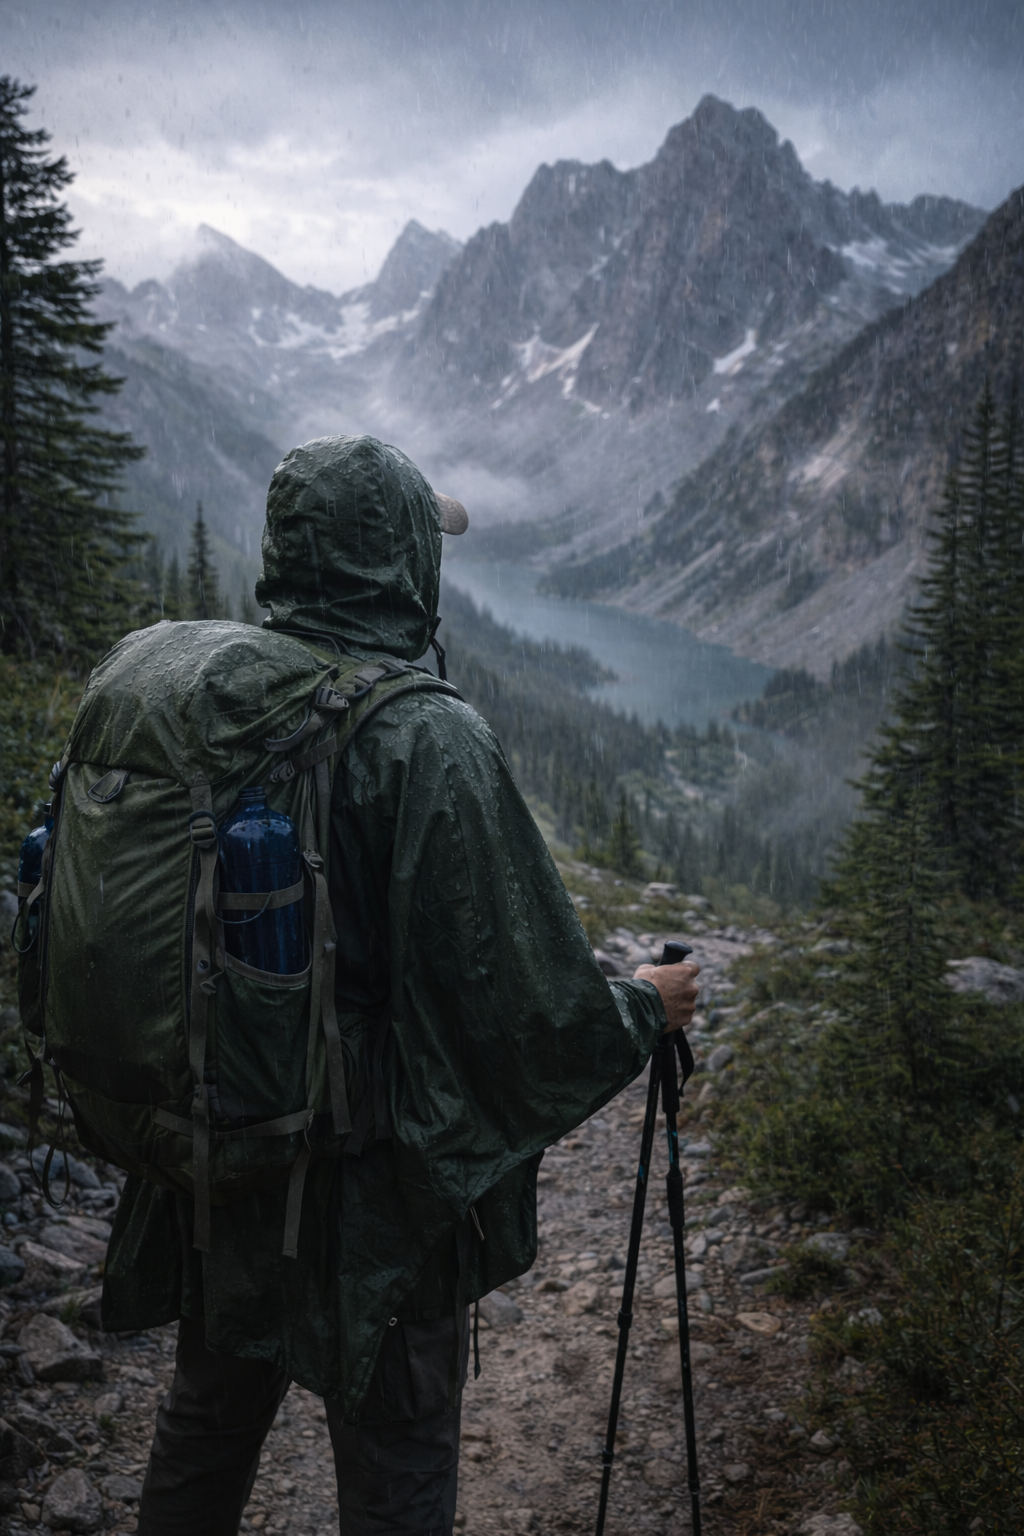
Beating the Dew Point: The Art of Site Selection
You can have the best groundsheet in the world and still wake up wet if you don’t understand the dew point. For instance, in the Pacific North West (PNW), the ground stays cold while the air might be slightly warmer. This temperature differential creates a vapor barrier effect.
When you lay your groundsheet down, you are trapping the earth’s moisture. If your sheet is too small, that moisture rises, hits the cold air, and condenses on the underside of your quilt. This is why “splash-back” is such a nightmare in floorless shelters. When rain hits the hard ground just outside your tarp, it causes a fine mist that drifts inward.
To achieve a bone-dry night, look for “duff”, this is what experienced hikers call the thick carpet of fallen pine needles. Duff naturally fails to mix with water and provides a layer of air between your groundsheet and the true “wet” earth. Avoid grassy meadows. They might look like a postcard, but grass is a literal moisture pump, transpiring water into your shelter all night long.
The Sub-10 Setup: Putting it All Together
So, how do you actually reach that sub-10-pound goal without ending up hypothermic? It’s about integration. Your groundsheet shouldn’t just be a floor; it should be a gear-repair station and an emergency signal.
If you use a Polycryo sheet, you can see through it. This makes it much easier to clear your site of sharp pinecones or rocks after you’ve laid it down, protecting your expensive inflatable pad from the dreaded “slow leak.”
Have you ever considered that your groundsheet is the most important piece of gear in your pack? Your tent keeps the rain off your head, but your groundsheet keeps the life-extinguishing cold of the earth away from your core.
For a Seattle-based hiker, the choice is clear. If you’re heading into the Olympic National Park where the ground is a permanent sponge, take the Tyvek. The extra two ounces are a cheap insurance policy for your $500 quilt. If you’re speed-packing the PCT in high summer, Polycryo is your best friend.
Stop focusing on whether your tent is “waterproof” and start asking if your groundsheet can handle the pressure of your own weight. Because at the end of a 20-mile day, the only thing that matters is the “bone-dry” feeling of a well-earned sleep.
Are you ready to ditch the heavy tent floor and trust your material science? Let’s get your base weight down and your comfort level up.


Leave a Reply